Get Certified at Your Pace
#1 Leading Project Management Online Training Provider
100% Online and Self-Paced Certification Courses.
How can I create and publish a course?
Click on "Courses" section on your admin dashboard. You will see "New Course" button on right above part of the screen. Click on "New Course" to create your course.

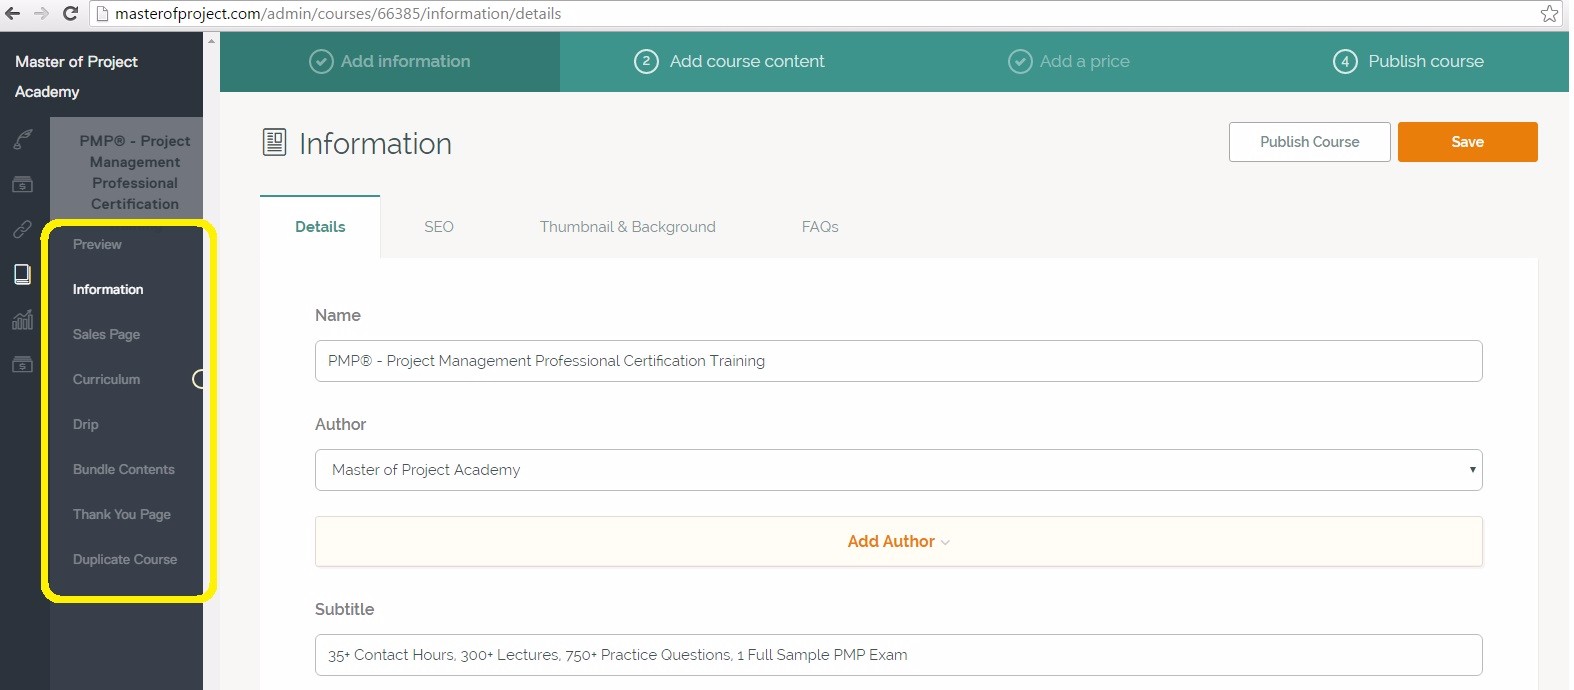
Update your course title, select yourself as author from the drop down menu and set the subtitle of the course respectively. For the Course Description part, we use a common structure. Although you are free to set your course description as you wish, we strongly recommend you to use our common structure. You can simply copy and paste it to your course description from one of our paid courses, and start to edit. (e.g. http://masterofproject.com/courses/pmp-exam-comple...)
After you finished editing, click on "Create Course" button you will at the bottom of the page.

At the 2nd Step, you will upload your course content. You can create sections, and lectures under these sections. You can also choose bulk upload option to upload several files at once.

You can upload mp4 files, add text and quizzes as course content. After uploading your lectures, do not forget to publish.

After you uploaded your course content, you need to set your course price at 3rd step. We do allow only USD currency and one-time purchase for the moment. Therefore, you need to select "one-time purchase" option here. If you are creating a free course, then select the "Free" option.

Select USD as currency, and then the course price you want to set. Note that, we do not allow course prices higher than 300 USD. Determine a price between 0-300 USD.

Click "Add Pricing" and you will see that your course price has been set as below. We do not allow course prices to be changed more than 1 per month. Because, coupon codes are tied to pricing plans in our platform. When you changed the price of a course, previous coupons you generated for that price will be invalid.
We strongly recommend you to determine your course price first, and do not change in future.
Click on "Finish" to complete course creation after you finished pricing.

After you created your course, it won't be live until you hit the "Publish" button.

We do strongly recommend you to go through each section on the left pane of your course. These sections provide great flexibility to customize your course and make attractive for the students. Sales page preview enables you to review how your course is viewed by a visitor.

What is not allowed in Course sections?
-We do not allow unrelated images to be set as your course picture
-We do not allow any links, email addresses or referrals to any other websites (including your personal website, blog etc.). You can place links for your social media profiles (twitter, facebook, linkedin etc.)
